
In bookbinding, the awl is one of the simplest yet most important bookbinding tools. It’s used to pierce clean, precise holes in paper and covers, making hand-sewn bindings easier, sturdier, and more professional. Whether for DIY notebooks, creative personal projects, or professional book editions, this little tool has a big impact. Let’s explore its uses, types, and tips for working with an awl.
Awl explained briefly
An awl is a pointed tool used in bookbinding to pierce sewing holes in paper and covers. Different needle tips and handle shapes provide control and precision for various binding techniques.
Definition: Awl
An awl is a small, pointed tool used to pierce holes in paper, leather, or book covers. This is an essential step in hand-sewn bookbinding. It typically consists of a comfortable handle and a sharp steel shaft, often rounded or slightly tapered. This intentional design allows for clean, precise holes without damaging the material.
Note: While similar tools exist for leatherwork or stitching in other crafts, a bookbinding awl is finer and optimized for piercing paper and book materials rather than thick hides or fabrics.
Printing services at BachelorPrint
- Individual solutions & personal support
- High print quality & fast production times
- Wide range of print products for every need
Learn more!
Why use an awl in bookbinding?
An awl is essential in bookbinding because it allows you to create clean, precise holes for stitching.
These holes:
- Prevent tearing
- Ensure better alignment of pages
- Make sewing signatures far easier
➜ All of which contribute to a sturdy, professional-looking book
For hobbyists and DIY creators, using an awl makes your handmade notebooks or journals look neater and last longer. Even for small projects, this tool helps you achieve consistent stitching and a more polished finish.
In professional bookbinding, awls are often used in combination with tools like punching cradles and templates. This allows bookbinders to prepare multiple signatures quickly and consistently, ensuring uniform stitching across entire print runs.
Types
Bookbinding awls come in many forms, each designed for specific tasks in the binding process. Choosing the right one depends on your materials, binding style, and whether you’re working on a one-off craft project or professional production.
Most common types
The most common general-purpose awl with a comfortable handle and fine point.
Primarily used for marking rather than piercing. Ideal for preparing guides and measurements.
Features a shaft that gradually narrows to a fine point. Available in light-duty (for paper) or heavy-duty (for leather or board).
Designed for sewing signatures with a slim shaft for consistent, needle-ready holes.
This awl features a brass chuck that allows you to swap out needles of different sizes.
Note: If you’re working mainly with paper, a standard or light-duty tapered awl is sufficient. For leather or board, choose a heavy-duty or diamond-shaped awl.
Comparison
Choosing the right awl depends on your project, materials, and experience level.
Awl type
Best for
Skill level
Bookbinder's awl
General-purpose piercing in paper/signatures
Beginner
Scratch awl
Marking guidelines on covers or pages
Beginner
Tapered awl
Paper (light-duty) or leather/book board (heavy-duty)
Beginner–intermediate
Stitching awl
Creating consistent sewing holes for signatures
Intermediate
Brass chuck awl
Versatile use with interchangeable needles
Professional
Needle design
The needle (or shaft) of an awl determines how it pierces the material. Its shape, size, and features affect both precision and ease of use.
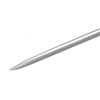
Fine-point needles
- Best for: Paper or thin covers
- Why use it: Creates clean, precise holes with minimal tearing
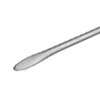
Tapered needles
- Best for: Leather, fabric, or multiple layers
- Why use it: Creates larger holes for heavy-duty cotton and thicker materials
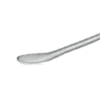
Curved needles
- Best for: Complex bindings needing angled entry points
- Why use it: Helps reach folds at an angle, particularly in exposed-spine books
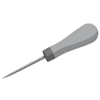
Long needles
- Best for: Wide-page formats (A4 dimensions and above)
- Why use it: Easier to reach the fold of large sheets or signatures
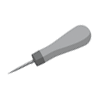
Short needles
- Best for: Thick paper or board
- Why use it: Allows greater force and control during piercing
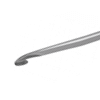
Hooked needles
- Best for: Stretchy materials like cloth or leather
- Why use it: Hook catches material effectively but requires care to avoid tears
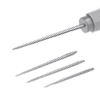
Interchangeable needles
- Best for: Multi-purpose work requiring different gauges or lengths
- Why use it: Allows swapping out needles, reducing the need for multiple awls
Comparison
Choosing the right needle design depends on your project, materials, and experience level.
Needle type
Best for
Skill level
Fine-point
Paper or thin covers
Beginner
Thick/Tapered
Leather, fabric, or multiple layers
Beginner–intermediate
Curved
Angled entry for complex bindings
Intermediate
Long
Wide pages (A4 and larger)
Beginner–intermediate
Short
Thick paper or board
Intermediate
Hooked
Stretchy materials like cloth or leather
Intermediate–professional
Interchangeable
Multi-use with swap-out needles
Professional
Needle length & diameter (gauge)
The length and diameter (gauge) of an awl needle affect how it pierces the material and the size of the holes, making it important to choose the right type for your project.
Note: Use a tapered needle for versatile, one-off projects and a straight needle when speed and uniformity are essential (e.g., edition work).
Handle design
Comfort and control matter, especially for longer bookbinding projects. Awls are held in the hand while piercing paper or book board, so a good handle design prevents fatigue and improves precision.
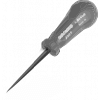
- Why use them: Lightweight and affordable, making them ideal for casual or occasional use.
- Best for: Hobbyists or DIY bookbinders working on light-duty projects.
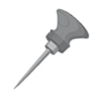
- Why use them: For specific grip needs, such as cork handles or reshaped wood for better comfort.
- Best for: Hobbyists or professionals who need a personalized grip or design.
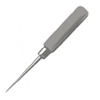
- Why use them: Provide better grip and control, especially for piercing fragile materials. Usually associated with light-duty awls.
- Best for: Thin papers like text-weight sheets or vellum.
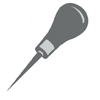
- Why use them: Fill more of the palm for a sturdier grip and even force. Often used in heavy-duty awls for thicker materials.
- Best for: Cloth, leather, or thick book boards.
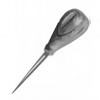
- Why use them: Traditional, sturdy, and ergonomic. They often mould to the hand over time, offering excellent grip.
- Best for: Professionals who need comfort and durability for repetitive work.
Note: Choose a long handle for fine control on delicate materials and a bulb handle for stronger force when working with heavy materials like leather or board.
Comparison
Choosing the right handle depends on your project, materials, and experience level.
Handle type
Best for
Skill level
Plastic
Light, affordable hobby use
Beginner
Custom
Personalized grip for specific needs
Beginner–intermediate
Long
Delicate materials, controlled piercing
Beginner–intermediate
Round
Heavy-duty piercing (cloth, leather)
Intermediate–professional
Wooden
Professional, ergonomic use
Intermediate–professional
How to use
Using an awl ensures clean holes, accurate stitching, and safe handling.
Preparation
- Align the pages or signatures carefully.
- Use a punching cradle for stability (or stack them neatly on a solid surface if you don’t have one).
Marking holes
- Create or use a template for evenly spaces sewing stations.
- Lightly mark each point on the spine fold to guide your piercing.
Piercing
- Hold the awl firmly and apply even pressure; avoid forcing it through too quickly.
- Keep the shaft perpendicular for straight holes and consistent stitching.
Safety tips
- Always pierce away from your hand.
- Use a cutting mat or thick board to protect your work surface.
- For tougher materials, use a heavier awl and work slowly to prevent slips.
Note: You can make a simple awl by setting a large sewing needle into a cork or wooden handle. This is ideal for casual and budget-friendly bookbinding.
Common mistakes
Even a simple tool like an awl can cause problems if used incorrectly. Here are some frequent issues and how to avoid them.

Pushing too hard
Forcing the awl can tear pages or crush signatures.
➜ Apply steady, controlled pressure, and let the tool do the work.

Piercing at the wrong angle
Angled holes can lead to misaligned stitching and uneven book spines.
➜ Keep the awl perpendicular to the paper for straight, consistent holes.

Holes too large or too small
Using the wrong awl size can cause loose stitching or make threading difficult.
➜ Match your awl size to the cotton thickness and material.
Note: In professional bookbinding, using a punching cradle helps maintain perfect alignment and reduces the risk of these common mistakes.
Tips & tricks
Mastering an awl takes practice. These tips will help you get cleaner results and work more efficiently.

Keep your awl sharp
A dull awl requires more force and can crush or tear the paper.
➜ Sharpen the needle with fine-grit sandpaper or a sharpening stone.

Stabilize your work
Working on a flat table can cause pages to shift while piercing.
➜ Use a punching cradle or secure your signatures between boards.

Prioritize hand comfort
Extended projects can strain your hands if your grip isn’t right.
➜ Choose a handle design that suits your grip and reduces fatigue.

Match hole size to cotton
Large holes with thin cotton look sloppy; small holes make sewing difficult.
➜ Select the right awl size for your cotton thickness.

Use a template for accuracy
Eyeballing hole placement often leads to uneven stitching.
➜ Create or print a piercing template for perfectly spaced sewing stations.
Hardcover with individual embossing
- Price calculator & 3D live preview
- Professional binding for thesis, dissertation, or books
- Print on demand with fast delivery right to your doorstep
Learn more!
FAQs
A pointed tool used to pierce holes in paper, leather, or covers for sewing.
It creates clean, precise holes for stitching in bookbinding.
A thick needle, nail, or pushpin can work for simple projects.
It’s pronounced like “all.”
For making consistent, uniform holes, ideal for repetitive or edition work.